
In our spring cleaning series (spring cleaning the bathroom, bedrooms, and kitchen) we are addressing the best way to spring clean and organize the most common rooms in your home to make cleaning them: manageable, easier, and less time-consuming for yourself and your loved ones. This post contains an affiliate link. We may receive a small commission for purchases made through this banner or link (at absolutely no extra cost to you).
Hopefully, you started spring cleaning your home and have already spring cleaned your bedroom. Maybe you even got the family to help.
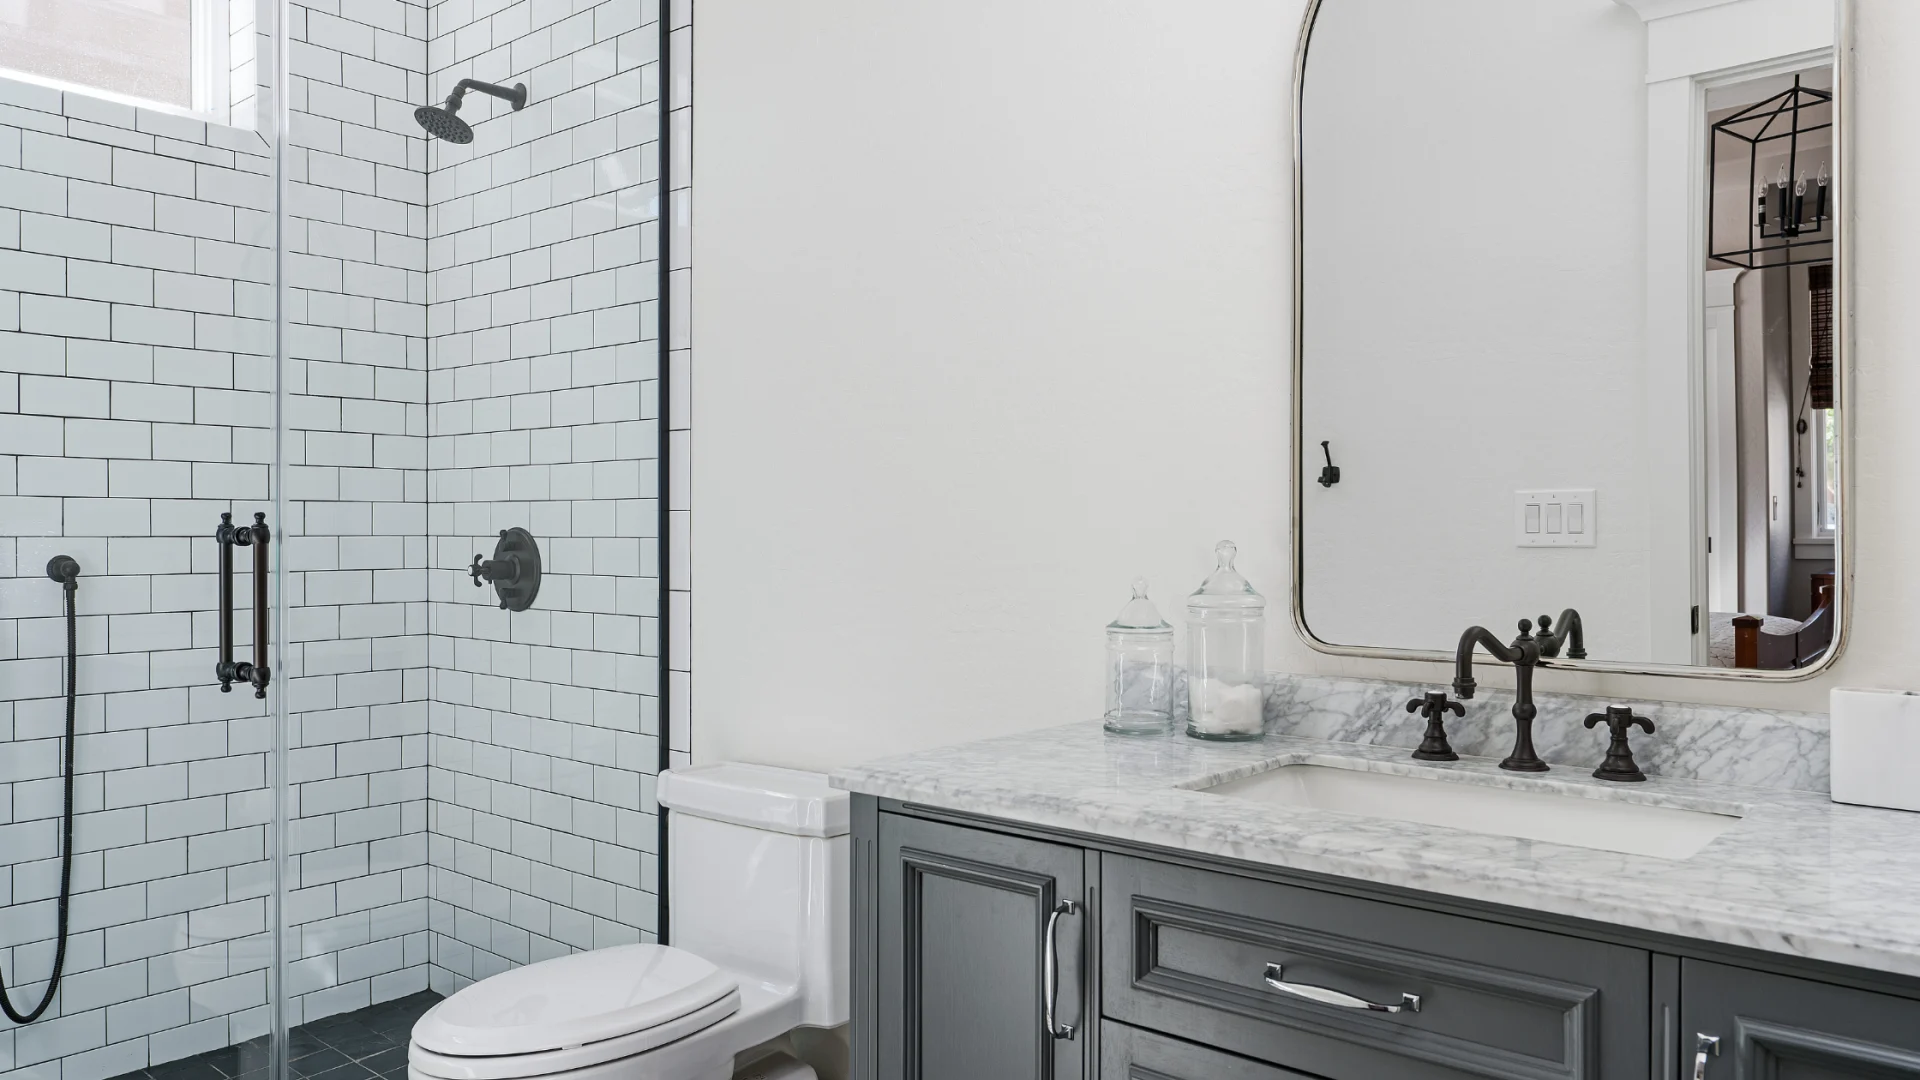
Now, we will focus on spring cleaning the bathroom. We go there to clean our bodies, yet it is one of the dirtiest rooms in the house. There are things that you don’t realize or want to think about such as germs (bacteria and viruses), toilet plume, or even mildew or mold.
Your regular weekly cleaning may be missing some of these things, so spring cleaning will help you address them and get rid of them for the year to come.
In this post, we will lay out the best, most effective, efficient way for spring cleaning the bathroom and set up a year-long routine for thoroughly cleaning your home.
Spring Cleaning Vs. Deep Cleaning
In a previous post, we mentioned deep cleaning. Spring cleaning goes beyond deep cleaning because it involves organizing and preparing your home for the rest of the year. It is also to get rid of any dust, allergens, and even mold trapped in your home during the winter months.
Spring Cleaning the Bathroom
The problem with spring cleaning the bathroom (or cleaning it in general) is that it is time-consuming and overwhelming.
In most homes, the bathroom is a crammed, compacted room used by multiple people daily for various reasons that all seem to revolve around water.
This moist environment is a breeding ground for mildew and mold that can be harmful to you and your family’s health. Since the bathroom also contains a lot of invisible germs, there are some areas you will need to not only clean but take the extra step of disinfecting to kill these germs.
So start with a plan. Like most things, begin with a plan and don’t deviate from it unless you have to. The key to getting spring cleaning done the quickest, most efficient way possible and not to get distracted by shiny objects, aka other stuff in the bathroom, and stick to the plan.
Here’s the Plan:
Start with the top and clean your way down. For anything you clean, start from the top and clean down; that way, you are cleaning up everything that falls below as you keep going down. Spring clean your bathroom in the order below.
Start the Washer
Throw washcloths, towels, dirty clothes, rugs, and the shower curtain into the washer.
Follow the manufacturer’s instructions and start the washer. If you have washable window coverings, throw them in the washing machine (follow the manufacturer’s washing instructions).
Now open the window and get some fresh air into the room.
Ceiling
Wipe the ceiling with a microfiber cloth or duster to remove cobwebs and dirt. If you find any mold on the ceiling, remove it using vinegar.
Ventilation (exhaust) Fans
Ventilation fans can accumulate dust and dirt over time, which can cause them not to function properly. They are one of the best ways to help prevent mold and mildew. Without them, moisture has nowhere to go. So you get the idea of why cleaning them is so important, but when was the last time you cleaned yours?
If it’s been a while since you cleaned your exhaust fans, follow this step-by-step guide to clean your ventilation fan this spring properly.
Walls
Run a microfiber duster or cloth down the walls and towel racks starting from the ceiling. If you find any mold on the walls, remove it using vinegar.
If you have any shelves in your bathroom, remove everything on top of them. Wipe off the wall behind the shelves and the shelves themselves using a microfiber cloth.
To learn how to kill mold and remove it using vinegar, read our article – Will Cleaning Vinegar Kill Mold?
Windows
While your drapes or curtains are still washing, the next area to spring clean in the bathroom would be the windows. If you don’t have drapes or curtains and instead you have blinds or shades, check out this guide to cleaning them.
Wipe
Starting at the top part of the window, wipe down the window trim and all parts inside the window and window frame, including the screen (without taking the screen out) with a dry microfiber cloth.
If you can fold the window in to get access to the window facing outside, wipe everything down on the outside of the window as well. Whatever dirt, dust, leaves, dead insects, or spider webs that fall to the bottom of inside the window frame, vacuum up.
Now, fill a bucket with warm water and put a few drops of dish soap or a drop of Miracle II soap (affiliate link) in it. Dip the dry microfiber cloth into the bucket, only partially wetting it and go over the whole window and window frame again. Use the dry part of the microfiber cloth or paper towel to wipe up excess water and soap.
To learn more about Miracle II soap, read our review of it – Miracle II Soap: The Ultimate Review of its Unparalleled Cleaning Benefits
Clean the glass part of the window after everything else is clean. Fill a spray bottle with half white vinegar and half water. Spray the glass, then use the partially damp microfiber cloth or paper towel to wipe it up, wiping it in a Z motion.
Finally, wipe the window sill and the apron underneath it.
Vanity Lights
Remove each light bulb and wipe with a microfiber cloth. Remove each light bulb shade and wash with soap and water, then let dry. Clean with a microfiber cloth or duster all around the light sockets.
Medicine Cabinet
Remove everything in the medicine cabinet and check the dates. Throw out anything that is expired or has spilled.
Wipe down the shelves and the items and put them back. If you have any other drawers, cabinets, or storage areas in your bathroom, do the same thing with them.
Mirrors

Much like a window, you can clean a mirror using a spray bottle with half water and half vinegar. Spray it on and then use a partially damp microfiber cloth or paper towel to wipe it up, wiping it in a Z motion.
Bathroom Sink
Spring cleaning the bathroom sink may not be much different than the weekly cleaning you do now, but this is an area you don’t want to forget the additional step of disinfecting.
How to Clean Your Bathroom Sink
Stainless Steel or Porcelain Bathroom Sink:
Cover the surface of the sink with warm water. Sprinkle baking soda over the sink. Wipe the baking soda (paste) around the sink using a rag or cloth. Use an old toothbrush to brush the paste around seals and cracks.
Pour some vinegar (vinegar will help eliminate any water spots) around the surface of the sink, then wipe the paste and vinegar together around the sink.
Next, wash off the cloth and start using it to remove the paste and baking soda. Keep washing the cloth off and wiping and removing the paste. If your sink is a stand-alone, don’t forget to clean the underside of the sink.
To learn more about cleaning a stainless steel sink, read our guide – How to Clean a Stainless Steel Kitchen Sink Naturally (in 6 Steps)
Disinfect the Bathroom Sink
After you have cleaned the sink, disinfect it using hydrogen peroxide or rubbing alcohol.
- Hydrogen Peroxide: To get the most out of hydrogen peroxide’s disinfecting properties, spray or pour it on the surface of the bathroom sink and let it sit for at least 60 seconds, then wipe.
- Isopropanol 70% or higher (Rubbing Alcohol): To get the most out of isopropyl alcohol, apply it to the bathroom sink surface and let it sit for at least 30 seconds, then wipe it up.
Learn how to disinfect or sanitize your home by reading our article – Should You Disinfect or Sanitize Your Home?
Toilet
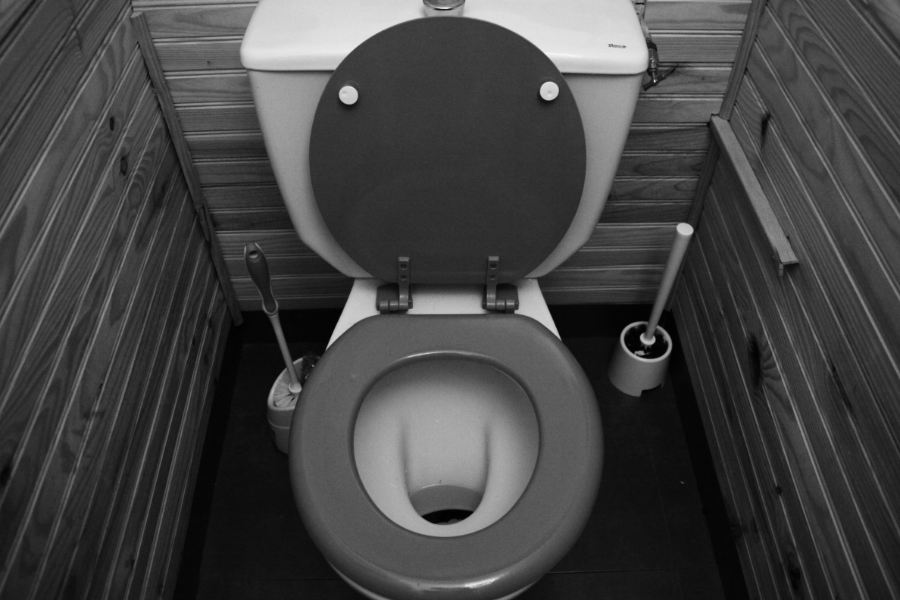
The toilet may be the most dreaded spot in the house to clean (we don’t need to explain why). Because of this, you may tend to ignore certain areas of it, including the accessories when you do your weekly cleaning. So, to spring clean the toilet, you need to completely clean it and anything around it.
Follow the Nine Steps below to Spring Clean the Toilet
1. Combine a couple of drops of dish soap or a drop of Miracle II soap (affiliate link), ½ cup of water, and ½ cup of vinegar in a spray bottle.
Spray down the outside of the toilet. This should include the top, sides, and underside of the tank (a common place where mold can accumulate), both sides of the lid and seat, and around the hinges, base, and floor where the base sits.
3. Let it sit for 5 – 10 minutes.
4. Wipe down the toilet with a paper towel, microfiber cloth, or your choice of rag.
5. Sprinkle baking soda inside the bowl and use a toilet brush to scrub the stains. To help remove rust stains, add some vinegar.
6. Following the previous directions for disinfecting, use hydrogen peroxide or rubbing alcohol to disinfect the handle, lid, and seat. If you prefer, disinfect the entire toilet.
7. You may have never thought about cleaning inside the tank of the toilet, but it does need cleaning, and right now would be a good time to do that. Follow this guide to clean the inside of the toilet tank.
Toilet Accessories
In your bathroom, you might have two things sitting next to the toilet: A toilet brush and a plunger.
8. Toilet brush: Using the spray bottle you used earlier to clean the toilet, spray the brush and base. Wait a minute, then dip it in the clean toilet and put it back in the base.
9. Plunger: Maybe your toilet plunger is used a lot, or maybe not, but regardless, it too, needs to be cleaned and disinfected. Follow the directions above for cleaning the toilet brush to clean the toilet plunger.
If you’ve had enough of spring cleaning the bathroom for one day, we understand, and this would be a good time to stop. Or, if you still have the time and energy, your shower or bathtub unit is quietly waiting for you to spring clean it next.
Shower
Before we get into the different types of shower walls, there is one thing all showers have in common: (and you’re probably not cleaning it) a showerhead.
Showerhead
The showerhead might not be something you think about cleaning, but over time, it can clog with minerals or even rust. Your bathroom spring cleaning would not be complete without cleaning it.
To clean your showerhead, check out this simple 7-step guide.
Shower Walls
There is a variety of materials that shower walls consist of. Acrylic, ceramic, porcelain, glass, and stone are the most common. In this guide, we will cover how to clean acrylic shower walls.
Acrylic Shower Walls: To clean acrylic shower walls, spray the shower walls and handle using the same cleaner you used for the toilet and let it sit for 5 – 10 minutes. Spray the shower walls with water and use a microfiber cloth, or if necessary, a sponge to wipe off the walls.
Glass Shower Door
For cleaning a glass shower door, again, use the cleaning spray you created to clean the outside of the toilet. Spray the inside and outside of the shower door and let it sit for 5 – 10 minutes. Spray the door with water and use a microfiber cloth or sponge to wipe it dry.
Bathtub

Using the same cleaner you used previously (if you’re almost out, make some more!), spray the bathtub and handles, and let it sit for 5 – 10 minutes. Use a microfiber cloth or sponge to wipe it up.
For tough stains, run some water in the tub to get it wet, then sprinkle some baking soda on it. Follow the same procedure for cleaning the bathroom sink and wipe it around using any rag or cloth. If necessary, use a scrub brush or old toothbrush to remove the stains and clean around the bathtub handles.
Pour some vinegar around the bathtub, then wipe the paste and vinegar together around it. Next, wash off the cloth and start using it to remove the paste and baking soda. Keep washing the cloth off and wiping and removing the paste.
Disinfect any areas of the shower and bathtub area you think need to be. Once everything is clean and dried, put your clean shower curtain back on.
Light Switches and Doors
Light Switches
You probably don’t think about how often light switches are touched. They are high-touch areas in your home, so try to clean them often (more than just the springtime). To properly clean a light switch, use a dry microfiber cloth to go over the light switch and plate. If there are visible smudges, partially wet the microfiber cloth and wipe it down.
Doors
Much like light switches, door handles are also high-touch areas in your house. Try to clean them often. To properly clean a doorknob, use a dry microfiber cloth and wipe the doorknob on both sides.
Note: To clean your bathroom door, wipe it down with a dry microfiber cloth, including the frame and trim. For any visible smudges, partially wet one corner of the microfiber cloth and use it to wipe them.
Once you have cleaned the light switches and door handles, disinfect them.
Floors
Finally, we come to the last area and the final step to spring cleaning your kitchen. Before cleaning the kitchen floor, take a dry microfiber cloth or duster and wipe down the baseboards or floor trim just above the flooring. Then, vacuum the floor.
To get the best cleaning for your floors, use a microfiber mop head and one of the cleaners from our guide – 10 Non-Toxic Floor Cleaners: Our Guide to Floor Cleaning Products.
Conclusion (Spring Cleaning All Year Long)
You can clean these bathroom areas on different days throughout the Spring, or you can clean them all on one busy, long day.
Once your bathroom is spring-cleaned, here is what you can do to keep it tidy and clean for the rest of the year.
- Make a cleaning schedule for the rest of the year, scheduling a thorough cleaning every season.
- Every week go beyond your usual cleaning and clean one of the areas you previously spring cleaned. Since you already spring-cleaned these areas, it will be much easier and quicker to clean them.
- Hire a home cleaning service. Only have time for one thorough spring cleaning a year? Hire a house cleaning service to clean your whole house weekly, bi-weekly, or monthly and maintain that spring clean.
To read the other parts of our spring cleaning series, click the links below:
How to Manage Your Spring Cleaning – Spring Cleaning the Bedroom
How to Manage Your Spring Cleaning – Spring Cleaning the Kitchen
In the comments, let us know which all-year spring cleaning routine you prefer.
Cleaning yet simple but very important task!! Alot of us take it for granted thus our space come across dirty and untidy. Having a system in place like the way you described in your post is a must for anyone who is interested in keeping their bathroom super clean.
Thank you for sharing this with us.
All the best
Habib
Yes cleaning can be taken for granted and forgotten about. Hopefully this guide can help you clean every area in the bathroom and set up a cleaning routine for the year to come. You’re welcome!
Great article good use of words and the way it is written in general it kept me interested throughout and wanting to read more!
Very good, 🙂
Thanks Jason. I hope you found something useful in it!
Hey,
Really informative article on cleaning the bathroom. This is something I don’t keep on top of enough, I need to learn how to do it efficiently.
I’ll put into practice what you have taught us today and I’ll let you know how I get on.
Thanks for sharing and keep up the great work.
Tom
You’re welcome. I hope it helps! Let me know.
This post and your previous post on deep cleaning are spectacular! I need this in my life! lol.
Thanks Eric! Get to it!
I really like cleaning my home and these tips are very help. I like that you have taken time to address the trickiest places in our homes. A very detailed work through. Thank you
Thanks Ibinado! I hope the guide helps.
This is such an important article as far as the Health and Cleanliness of a family are concerned. To be honest, I’m hearing Spring Cleaning for the first time from this article. The process involved will be a bit taxing and in the meantime, an interesting thing, because it is going to be a task, meant for the whole year long.
I also agreed that the bathroom is a compacted place that is used by multiple people daily and therefore, cleaning it should be put in the top priority chart not only for the sake of cleanliness but also for a healthy living environment.
As many families do not care how they live, I wish that this article catches many more eyes and follow what Spring Cleaning is all about.
Thank you for sharing and I look forward to reading more of your articles.
All the best.
You’re welcome and thank you Phomrong. Cleaning is an important task that can help people stay safe and healthy. Make sure to stay healthy yourself!
Very informative post, particularly the tips about the cleaning agents to use, there can be so many to choose from that it gets overwhelming!
I’ve been on a mantra recently to intensify the level of cleaning and the bathroom was one of the top areas on my list. I do have difficulty removing the scum and discolouration from the tile grit, if you have any suggestions on how to tackle this, I’d love to hear it.
Thanks Sharon. If your trying to brighten the grout I would suggest hydrogen peroxide. When I just spring cleaned my bathroom, I used hydrogen peroxide on the grout of my tiled floor. I poured it in the grout and let it sit for a few minutes then wiped it up. Hydrogen peroxide is a natural bleach, so it brightens and cleaned the grout well. And of course, it also disinfected it.